
Create an agent
Create Fleet Agents from the Agents page for a company in HQ Console or with hq agents provision. Both paths let you choose the box size and show the company-specific monthly price before anything is provisioned. The setup creates the agent’s identity, membership, vault workspace, managed runtime, and selected authentication method as one resumable flow.
Before you start
You need:
- permission to manage agents for the company;
- a provider account or API key supported by the Console;
- permission to install apps in Slack if you plan to connect Slack; and
- approval for the recurring price shown by the Console before activation.
Provider choices can vary by account and release. Use the options shown in your Console.
Owners and admins can create agents when the company grants them the Create agents permission. Only a company owner can create an agent with the admin membership role. Machine agents cannot create other agents.
1. Set the identity
Choose an agent handle and complete its public profile. The handle becomes part of the agent’s company identity and is used by channels and vault paths, so treat it as permanent. You can change the display name, avatar, title, and description later.
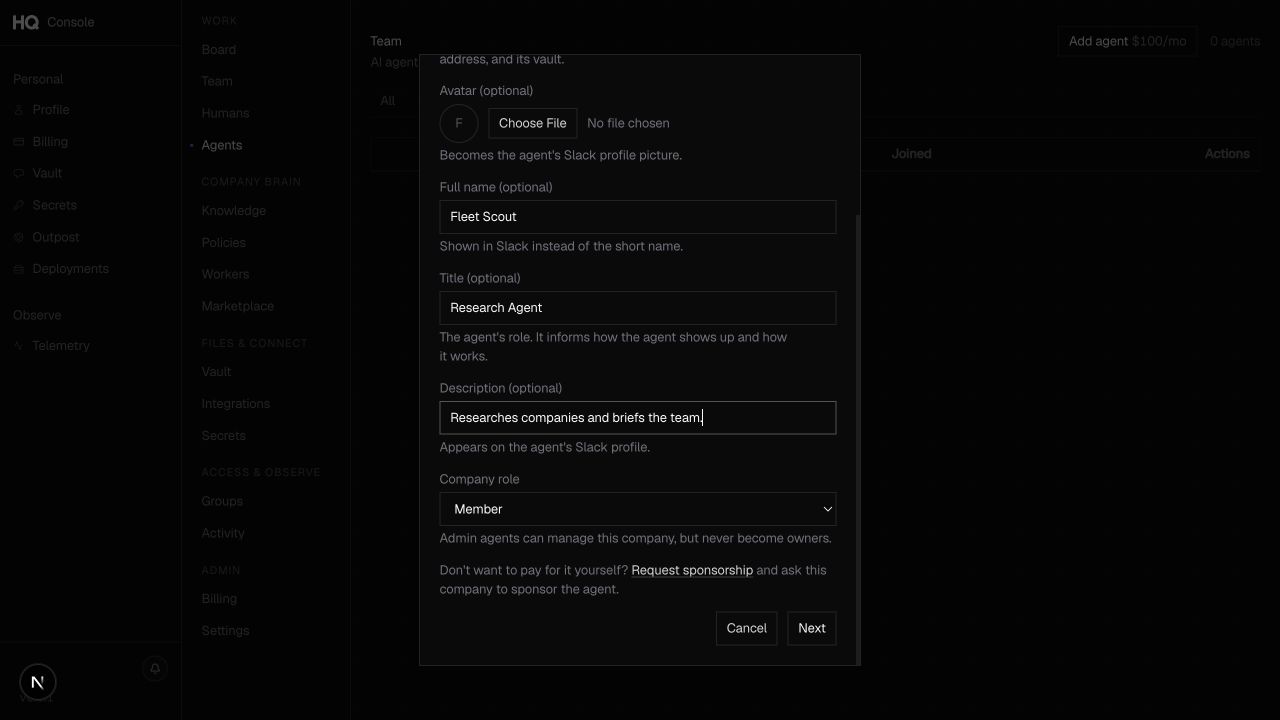
2. Choose a size and review the cost
Choose Basic, Power, or Dev based on the work the agent will perform. The Console shows the capacity and applicable monthly price on each card. Contract pricing, plan inclusions, sponsorships, and account-specific overrides can change the amount, including making a size $0 for a company that is not billed per agent.
The CLI exposes the same choice and quote:
hq agents provision "Fleet Scout" --company acme --size powerBefore provisioning, the CLI prints the selected size, capacity, and company-specific monthly price, then asks for confirmation. Add --yes only for an already-reviewed automated flow.
See Agent sizes and billing for the size ladder and plan inclusions.
3. Choose a provider and authentication method
Select a provider, then use an authentication method that provider accepts:
| Provider | Authentication |
|---|---|
| Codex | ChatGPT subscription sign-in or an OpenAI API key |
| Grok | Grok subscription sign-in or an xAI API key |
| Claude | Claude subscription sign-in, when enabled for your account |
Subscription sign-in opens the provider’s device or OAuth flow. API keys are write-only: submit the key through the wizard, and HQ stores the credential in the company vault without displaying it again.
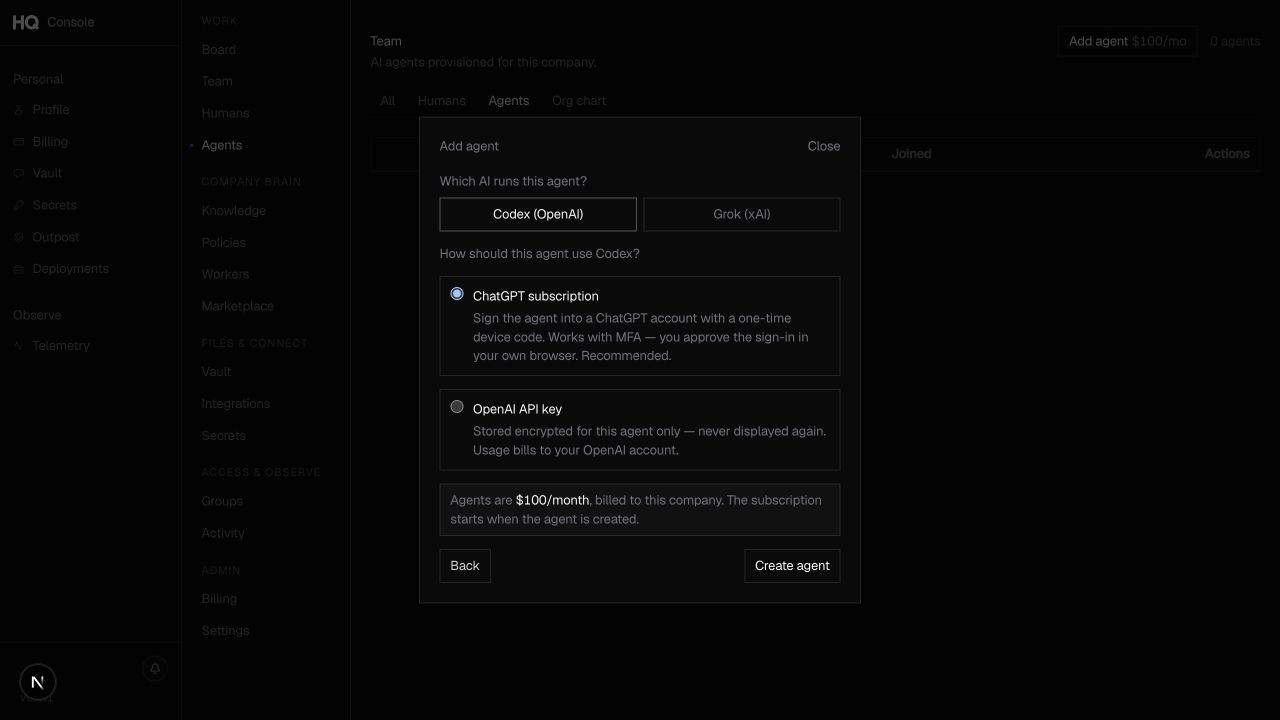
4. Confirm and provision
Review the selected size and exact recurring price displayed in the Console or CLI, then create the agent. Charging starts when the agent is created. HQ then works through the setup stages:
- create the agent identity and company membership;
- prepare the vault workspace and access grants;
- provision and bootstrap the managed runtime;
- complete provider authentication;
- sync the company context; and
- attach any channels selected during setup.
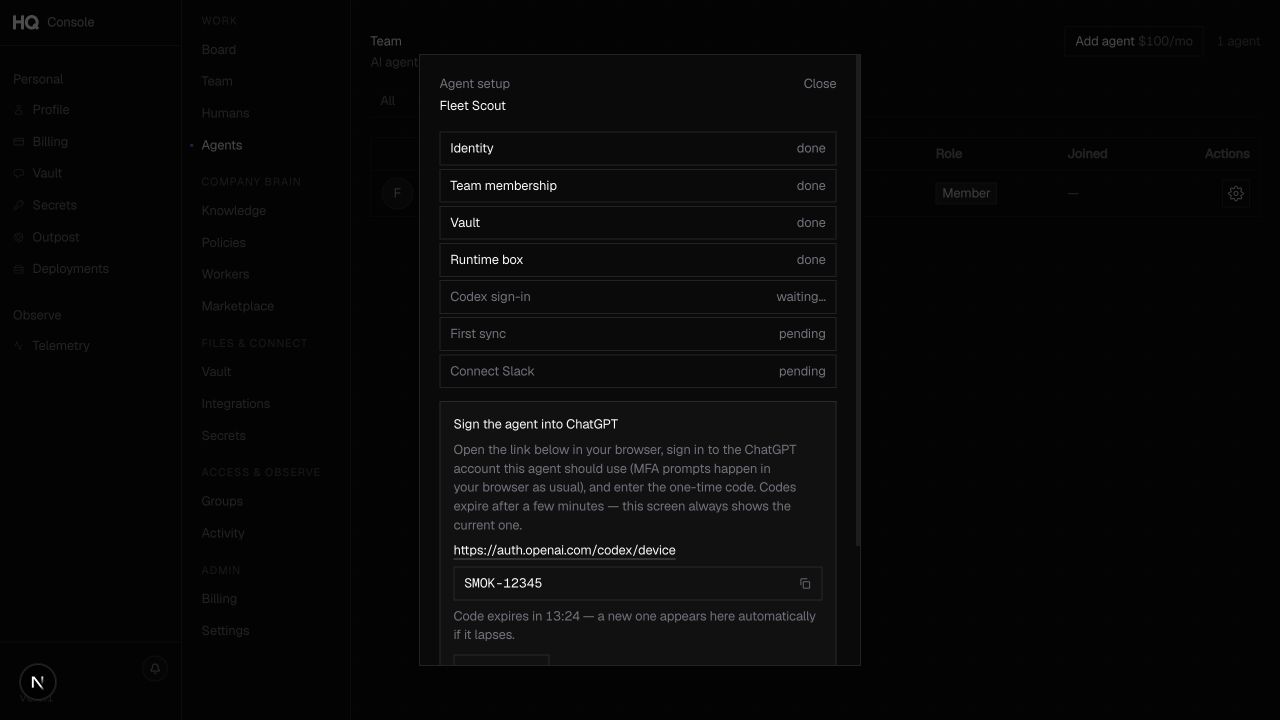
You can leave and return to the agent row while setup continues. If a stage needs attention, open the agent and follow the retry or reauthentication prompt rather than creating a duplicate.
A new agent has no company file, secret, or connector grants by default. Assign groups and explicit resource grants after the runtime is ready.
5. Verify the agent
When setup finishes:
- confirm the roster shows the agent as live;
- open settings and check the runtime and heartbeat signals;
- send a small task through a connected channel; and
- confirm the response arrives under the agent’s own identity.
Next, review the agent’s configuration and access before giving it production work.